The DJI Avata 360 is DJI’s new drone, capable of capturing 360° footage thanks to two new 1-inch-equivalent sensors that support 8K/60 fps HDR video.
We have had the drone in our hands for a few weeks now and have been impressed with how easy it is to fly and edit – although better instructions would make it even easier.
At an RRP of $799, it is one of the more affordable high-end options on the market and can be paired with the remote controller or with the goggles and joystick for flying. I was sent both control options and found both relatively easy to use, although there were differences – more on that below.
The Avata 360 is available in four different configurations, and which you prefer will depend on whether you already have a compatible controller and/or how you prefer to fly your drone:
I will preface this review by noting that my drone experience is very close to nil, so if I say something is easy, it isn’t because I am a pro drone pilot; it was intuitive and easy to learn.
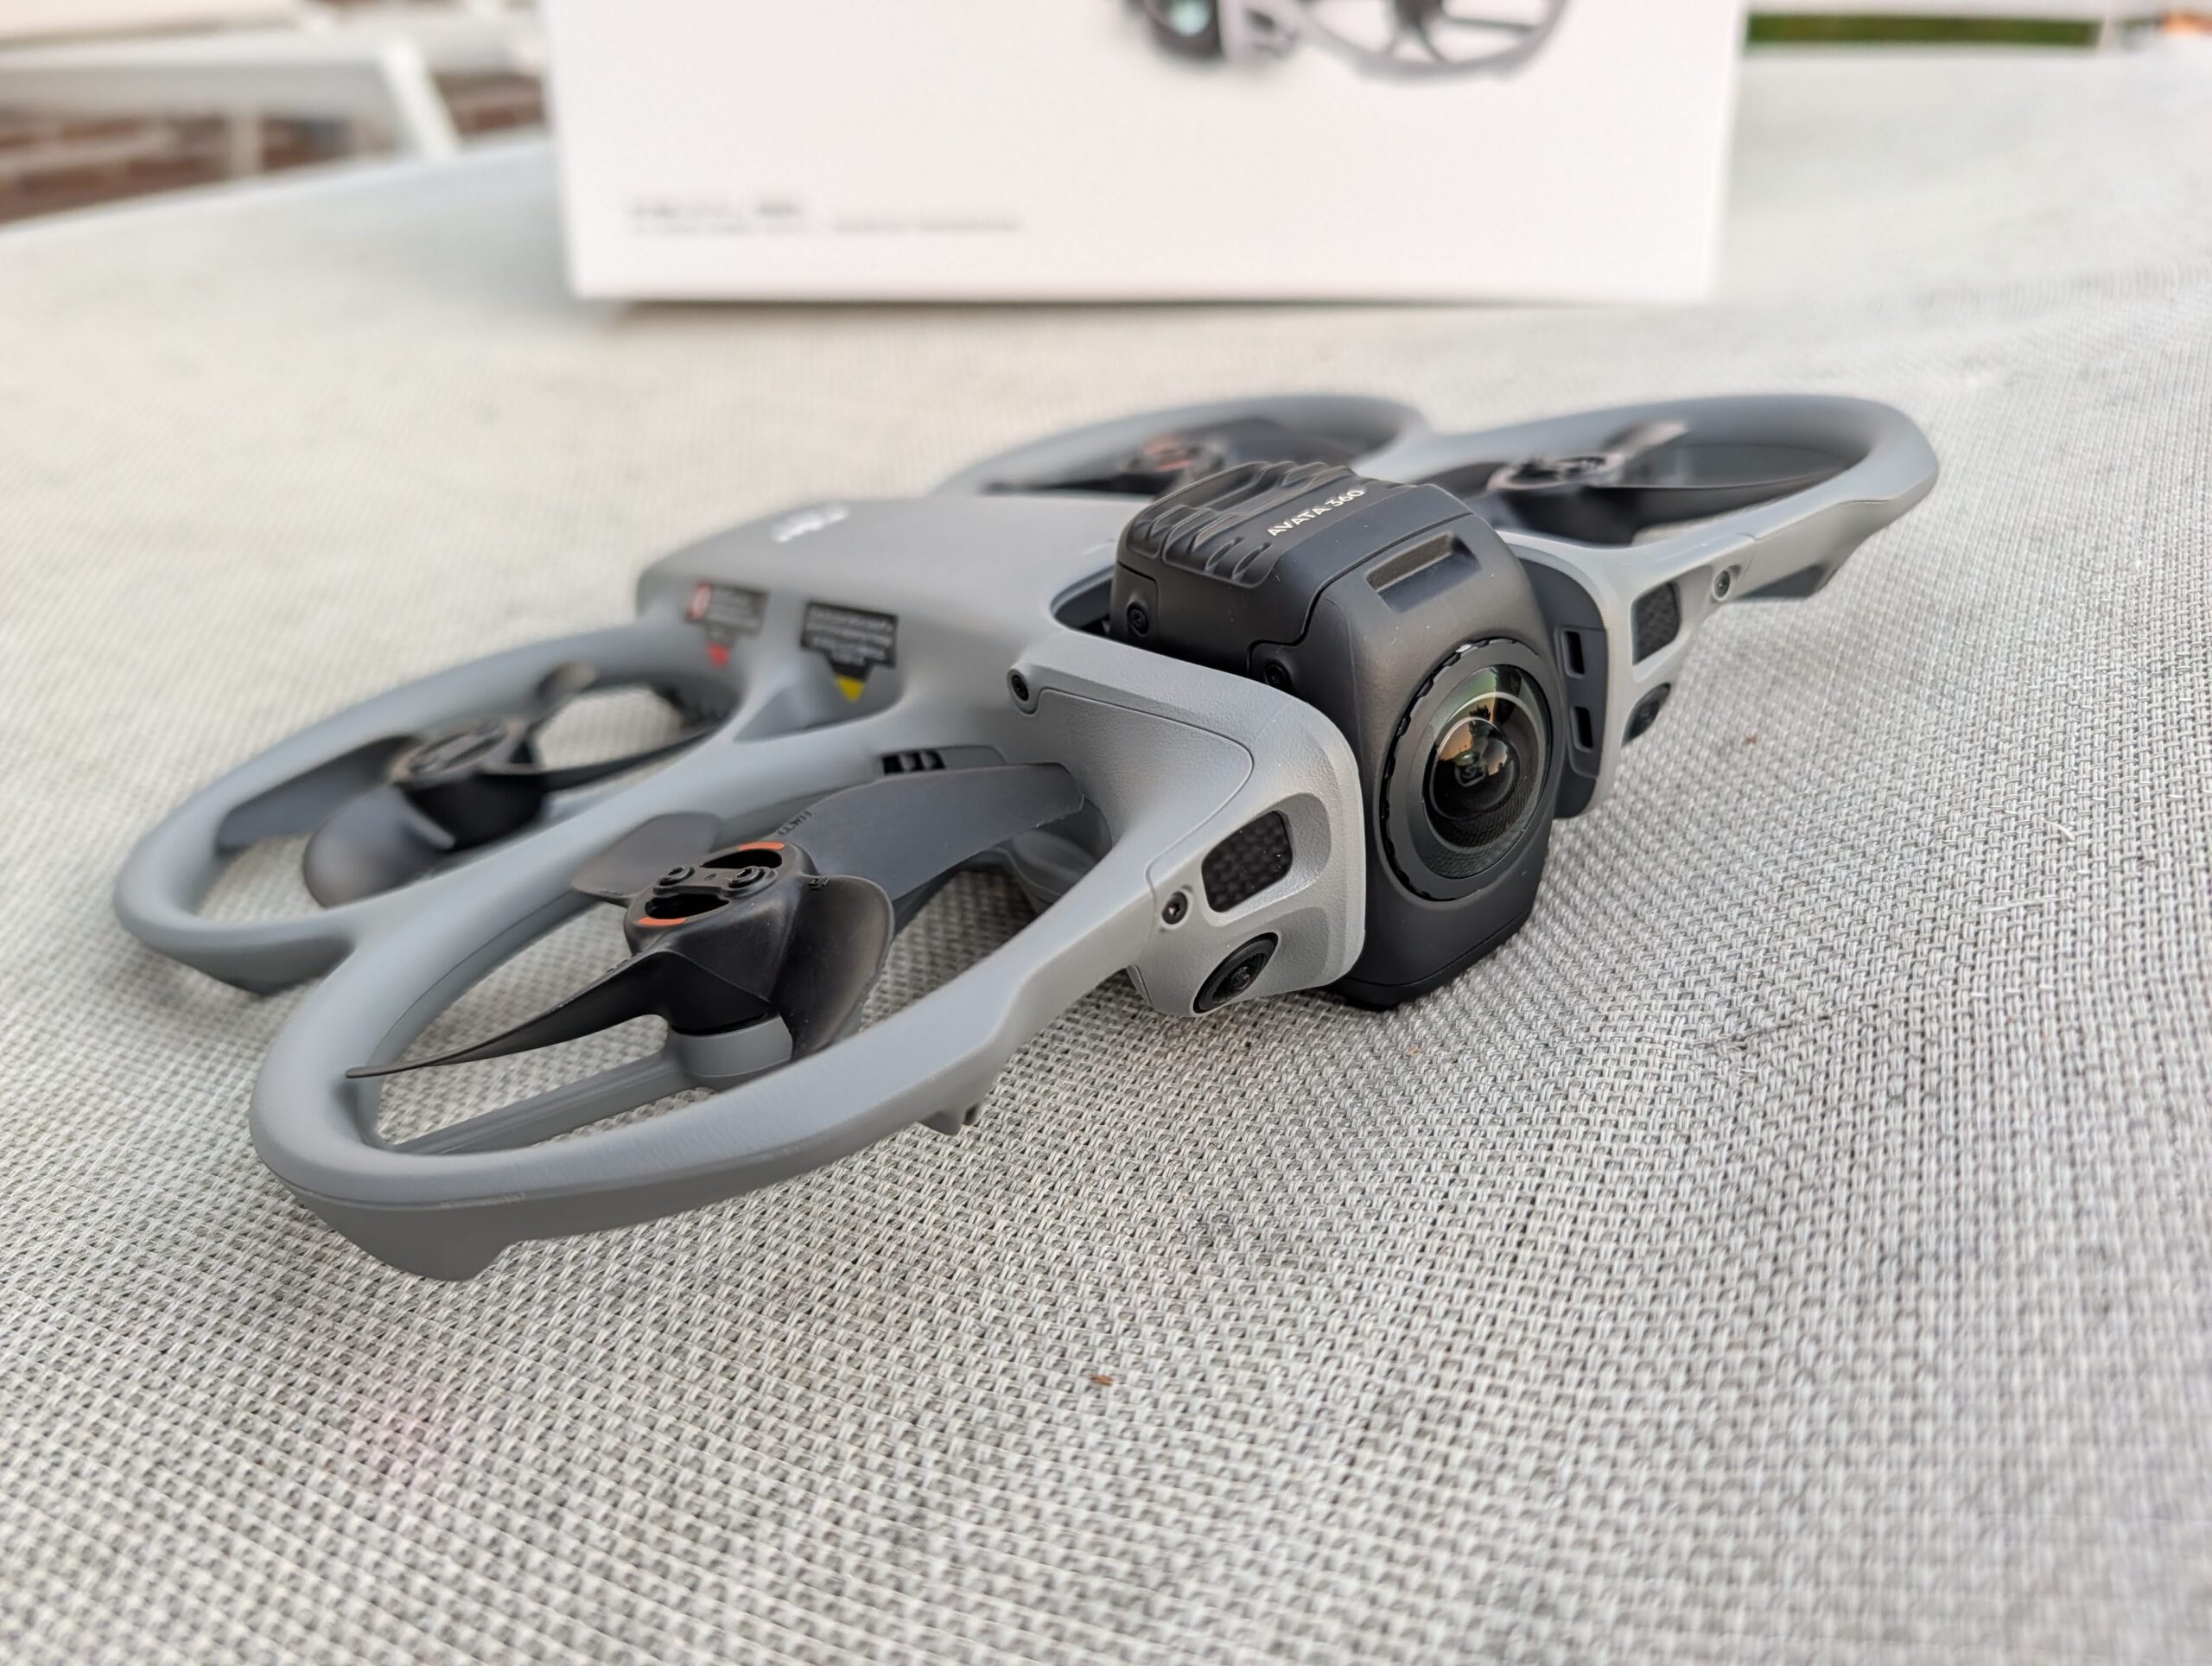
The Avata 360 features two fish-eye cameras that sit on the vertical sides of the drone while flying, but rotate out of the way when landing to prevent scratching — you can buy lens guard replacements though if needed. The two fisheye lenses capture a full sphere of footage, with stabilisation performed digitally, so the footage will follow the camera’s tilt and roll as it turns or drifts on the wind.
The build feels incredibly robust and should continue to operate well even after minor crashes – I am yet to crash it so I have not had the opportunity to test that out just yet (and hopefully never will).
The battery is inserted into the rear of the drone, and because battery life isn’t great, the drone comes with three batteries when you buy a Fly combo pack.
Setting up the drone is super simple, if you are using one of the basic remote controllers. All you have to do it make a DJI Fly account and log in on the remote controller and then bind the drone to that controller. You are then good to go.
The remote controller will run you through the basics of flying but I suggest you read all the documentation and watch the videos provided on the remote controller. The same information is available on the DJI Fly smartphone app so you may find it easier to read it there.
Binding the drone to the DJI Goggles N3 and RC Motion 3 controller is not as simple. You will need to use the DJI Fly app on your phone and connect the goggles to it with a USB-C cable (one is included, but I found that any decent USB-C cable worked).
I had a few issues getting everything all connected but eventually got there. It seemed to be a bit finicky connecting and updating the goggles as required before flying but I simply reset the goggles and started from scratch, this time being incredibly patient and it completed – second time’s a charm?
Note that once you bind one controller to the drone, the other controller is unbound, so if you want ot go back to using the other controller, you will have to bind them again – this will likely not be an issue for most people, as most won’t use two different controllers. I just had both as part of the review.
Flying the drone is super simple, even for a newcomer like myself.
Remote Controller – DJI RC2
For most folks, this is how they are used to flying drones. It is a handheld device with a simple display that lets you change software, focus, and image/video type with a single press.
You pilot the drone using two joysticks: one for up and down, left and right, and one for turning and forward and back. Super simple, and although when you first start it will feel like you are continually using the wrong joystick, you get used to it pretty quickly.
The RC2 apparently offers “up to 20km” of range and I assume that is in ideal conditions because I was only able to get a few kilometres away before it was telling me that the signal was weak. Of course, being a noob and having a review unit, I was super nervous about pushing the boundaries too far, so I flew it back whenever it got too far.
The RC2 and the drone both have microSD slots for video storage but I am not convinced you need one in the RC2, or at least not a very big card, because the RC2 was unable to transfer 360deg videos from the drone to it. Not a huge issue though, because you can use the smartphone app instead, or plug the drone directly into your PC.
Although I say no big issue, it is still a bit clunky and could be made so much more simpler but I dare say the issue is the strange file type that the drone captures its 360 deg footage in– you need special software to be able to read it. The easiest way to transfer the images was using the smartphone app.
Goggles N3 and RC Motion 3 controller
Before I start this, remember you must abide by your local laws when flying drones. One of the Victorian laws for drone flying is that if using goggles, you must have a spotter to help and watch you. Probably stops you from falling off the cliff or running into something you shouldn’t.
Controlling the drone with the RC Motion 3 was actually a lot easier than I thought it would be, although still not as easy as the RC2. There is a decent tutorial on using the motion controller, but I still found it strange to select menus and other options with the controller while flying the drone. It took me a while to get comfortable with that and until then you can always use the buttons on the goggles to access menus and just focus on getting good at flying with the motion controller.
For new pilots like me, there are simple auto takeoffs and landings, so you don’t have to stress about that. This works fairly well, although if you have the target set to a tabletop, which I did at one time, occasionally, the home GPS coordinates the drone sets for itself are not accurate enough to land on it so I had to take over. Not a huge issue but more a warning to pay attention at all times.
DJI include some “intelligent flight modes” such as Spotlight, Point of Interest, and ActiveTrack. These are the modes you will use to track people and cars, and to fly around a stationary object. There are a few different options here and I would suggest you try them all to find the one you actually need.
“QuickShots” where DJI gets a bit fancy with their cinematography. When you select this video capture mode, the drone will automatically perform various maneuvers while shooting footage. There are options such as:
I’ve included a few samples below of videos edited in the desktop PC app, as well as some from the phone app. There are also some 360-degree video samples (sit on a swivel chair to watch them best, as you can turn the chair to get the smoothest view around the drone), as well as standard single-camera video.
Photos are not great with the Avata 360 – the single-lens camera can only capture video, so photos are taken with the 360-degree lenses and, as such, look… different. If you want a photo as the standard view, your best bet is to record a video and then take a screenshot of that frame in post-processing.
Tracking can be performed while capturing the footage or in post-processing using the DJI Studio app. Below are a few examples of my attempts — you can even track a location, such as the centre square of the MCG.
I’ve seen some folks say the DJO Avata 360’s video editing software is difficult to use, but to me, it depends more on what you want to edit. If you just want to create a video with minimal editing from the raw footage, it is super simple, as you can see in most of the videos above.
More extensive editing though, is a bit lacking. The setup of the app is very similar to Camtasia, which I have used extensively, but unfortunately, the DJI app falls short on more complicated transitions – well, it does for what I can find in it. It has some nice transitions etc but it is difficult to find some functions I was after. I wonder whether DJI are working to improve it or just leaving it to Adobe?
I will say that the more you use it, the more you find new things to do with it. It is just a matter of making time to investigate and try out all the different options in the software.
With the 360-degree cameras onboard, you can track a subject after recording the video in the app if you forgot to do it while filming the original footage. You can even clean up the captured tracking with the app which is nice and adds just a nice polish to the resultant video.
I’ve seen some online call the software, the DJI Studio PC app, clunky and I suppose it is a bit, and although it is basic in its editing, it is enough for most users. If you want fancier edits, you’ll have to try out a supporting Adobe app. I’ve used a very similar video editing app extensively in the past, so I had no issues using it.
The drone’s battery life isn’t great, but you can get a good 40 minutes or more of footage from a single charge. The drone does come with multiple batteries, so just make sure they are charged before heading out and you’ll be fine. The drone does give you plenty of warning when the battery level is low anyway.
My dog hates the sound of drones and the Winter Olympics, and their extensive use of drones was not fun for him, nor for us, trying to stop him from going psycho at the TV because of the noise. He hates the sounds of the DJI Avata 360 as well, unsurprisingly. The Avata 360 is fairly noisy, with its small propellers working overtime to keep it stable and airborne, but it’s not a huge issue as most folks are used to drone noise these days.
The DJI Avata 360 offers multiple ways for you to pilot it — RC controller, a standard controller with a mobile phone and the RC Motion 3 controller with FPV Goggles — so you can have it your way.
While the big time feature of the drone is its support for 360-degree footage, you can also fly it in a single lens mode, but given 360-degree footage can be easily converted to single lens video in post processing, I can’t see why you may choose that option.
One thing the Avata 360 is though, is easy to fly. Even for a novice like myself, piloting the drone was super simple, as was capturing the various footage. My biggest issue came with video transmission and compatibility with various devices — drag and drop and using the DJI Studio app should solve these issues though.
The Avata 360 will not be your drone of choice for still images but for footage that you have time to process afterwards, it is great. It allows you to capture videos at once and get creative later in the footage processing.
The DJI Avata 360 is surprisingly relatively affordable for such an advanced drone. It is available now through store.dji.com and authorised retailers:
Scott is our resident open technology expert. If you can mod it, or want to use it your way, Scott has probably done it. From Laptops to phones, headphones and game consoles, he’s played with it and wants to see the next generation.
A young programmer wins the chance to visit his reclusive CEO and test a ground-breaking…
Taking power with you when you go somewhere, or adding in a battery to an…
Consumer electronics company Mova is expanding their robot vacuum cleaner range with their latest flagship…
Robot lawn mowers have come a long way in a very short amount of time…
Cell batteries are useful, yet also dangerous in the wrong hands - or mouths. Energizer…
As those tax refunds start to appear, it’s time to look at what you can…