


3D Printing has been around for a few years now. There’s a few ‘big’ names in the game, but a new entrant, Anker, launched their AnkerMake M5 via Kickstarter and then followed it up with the AnkerMake M5C earlier this year.
I’ve been 3D printing for a few years now. I started with the Cocoon Create ModelMaker and more recently the Ender 3 V2. I was given the opportunity to review the AnkerMake M5C 3D printer and given its reputation as an easy to use printer I jumped at the chance.
The spec list reads like a dream for anyone who’s used a 3D printer previously, with direct drive extruder, all-metal hot-end for printing with multiple materials (PLA, PETG, ABS, TPU), Auto-levelling, wireless connectivity, removable PEI magnetic, bendable build plate – the list goes on!
It’s a lot of printer hardware wise and then there’s the software. There’s the custom AnkerMake 3D Slicer software for Windows and Mac and mobile app for monitoring, controlling and even printing to it.

I’ve been using the AnkerMake M5C for about a month now and here’s how it went.
3D Printing – the Basics
We’re starting with a brief primer for anyone not familiar with 3D printers. There are two types of 3D Printers you’ll mainly find at home: Stereolithography (SLA) or resin printers, which uses a light source to harden liquid resin to print objects and Fused Deposition Modelling (FDM) which is extrusion based printing which uses materials like PLA, ABS, TPU and PETG to print objects.
The printers both use code generated from slicing software to print. Slicing software breaks down 3D models into layers that the printer can use. Slicing can be very important with regards to adding supports, rafts and controlling speed of printing.
There’s a large number of options for slicing software including Cura, Prusa Slicer, Simplfy3D, Photon, ChiTu Box and loads more with most of them free and relatively easy to use and progress the more you learn about printing.
Once you’ve sliced your 3D object, the files can be read by the 3D printer and hopefully printed successfully,
I’ve printed a lot of great stuff over the years as well as some spaghetti when it all goes wrong. There’s a lot to learn with 3D printing and it’s not always easy but can be rewarding. Newer printers coming out include a lot of baked-in features making it a lot easier to get into 3D printing without some of the frustrations felt by early 3D printing enthusiasts.

This is where the AnkerMake printers come in. Anker have taken an approach of making it as easy and as fast as possible to set up the printer, slice your model and get printing.
AnkerMake M5C
The AnkerMake M5C is the second FDM printer from Anker. The printer has a lot of the options you’d want, including a decent sized build volume, removable magnetic PEI sheet with heated bed, auto-levelling, direct drive and support for a wide-range of materials you can print from.
| Print Size (Build Volume): | 220×220×250 mm³ |
| Print Speed: | 500 mm/s |
| Plate Temperature (Max) | 100℃ |
| Build Plate | Removabe PEI Soft Magnetic |
| Auto-Leveling | 7×7 Point |
| Hotend: | All-Metal |
| Extrusion Flow: | 35 mm³/s |
| Hotend Tempreture (Max): | 300℃ |
| Nozzle: | Brass, 0.4 mm |
| Filament | 1.75 mm |
| Material Support: | PLA: YPETG / PET: YABS: YTPU: YPA: YPLA-CF: YPETG-CF: YPA-CF:Y |
Setup
Hardware
After setting up my previous printers which involved a lot of fiddling about screwing it together, before even starting to level the bed, the setup for the AnkerMake M5C by comparison is a breeze.
There’s essentially two major structural components, the base with the build plate and the gantry with the extruder. To put it together you simply follow the instructions and use the excellent quality tool kit supplied in the box to screw the gantry into the main build area and then plug in the extruder and motors to the sockets.


There’s very little to do, with very easy to follow instructions. Connect the supplied power cord to the printer and then turn it on. There’s only a single Play/Pause button on the AnkerMake M5C, as well as a power switch on the back. Other than that, the entire thing is controlled from the internet either by the app on your phone, or the slicing software on your PC. You will need to setup an Anker account through Eufy (their parent company), but apart from that, it’s gloriously simple.
The advertising says 15 minutes for setup and it’s spot on. 15 minutes after the box was opened I was set up and ready to print from the app, which I did; with a 16 minute Benchy which despite some stringing was nigh on perfect out of the gate.

AnkerMake app
Setting up the printer using the AnkerMake app is easy. You download it either from the iOS App Store or Google Play.
Using the app you’ll set your printer up, connect to the Wifi, set up an Anker account if you need one and then you’re set.
The app itself has three screens, a Devices tab, an Explore tab and a Me tab with your account details.

The Devices tab will let you control and monitor your AnkerMake printer, giving you controls for the X, Y and Z axis of the print head, the temperature of the nozzle and build plate, as well as extraction and retraction controls for the filament. You can also perform auto-levelling and update your firmware as required.
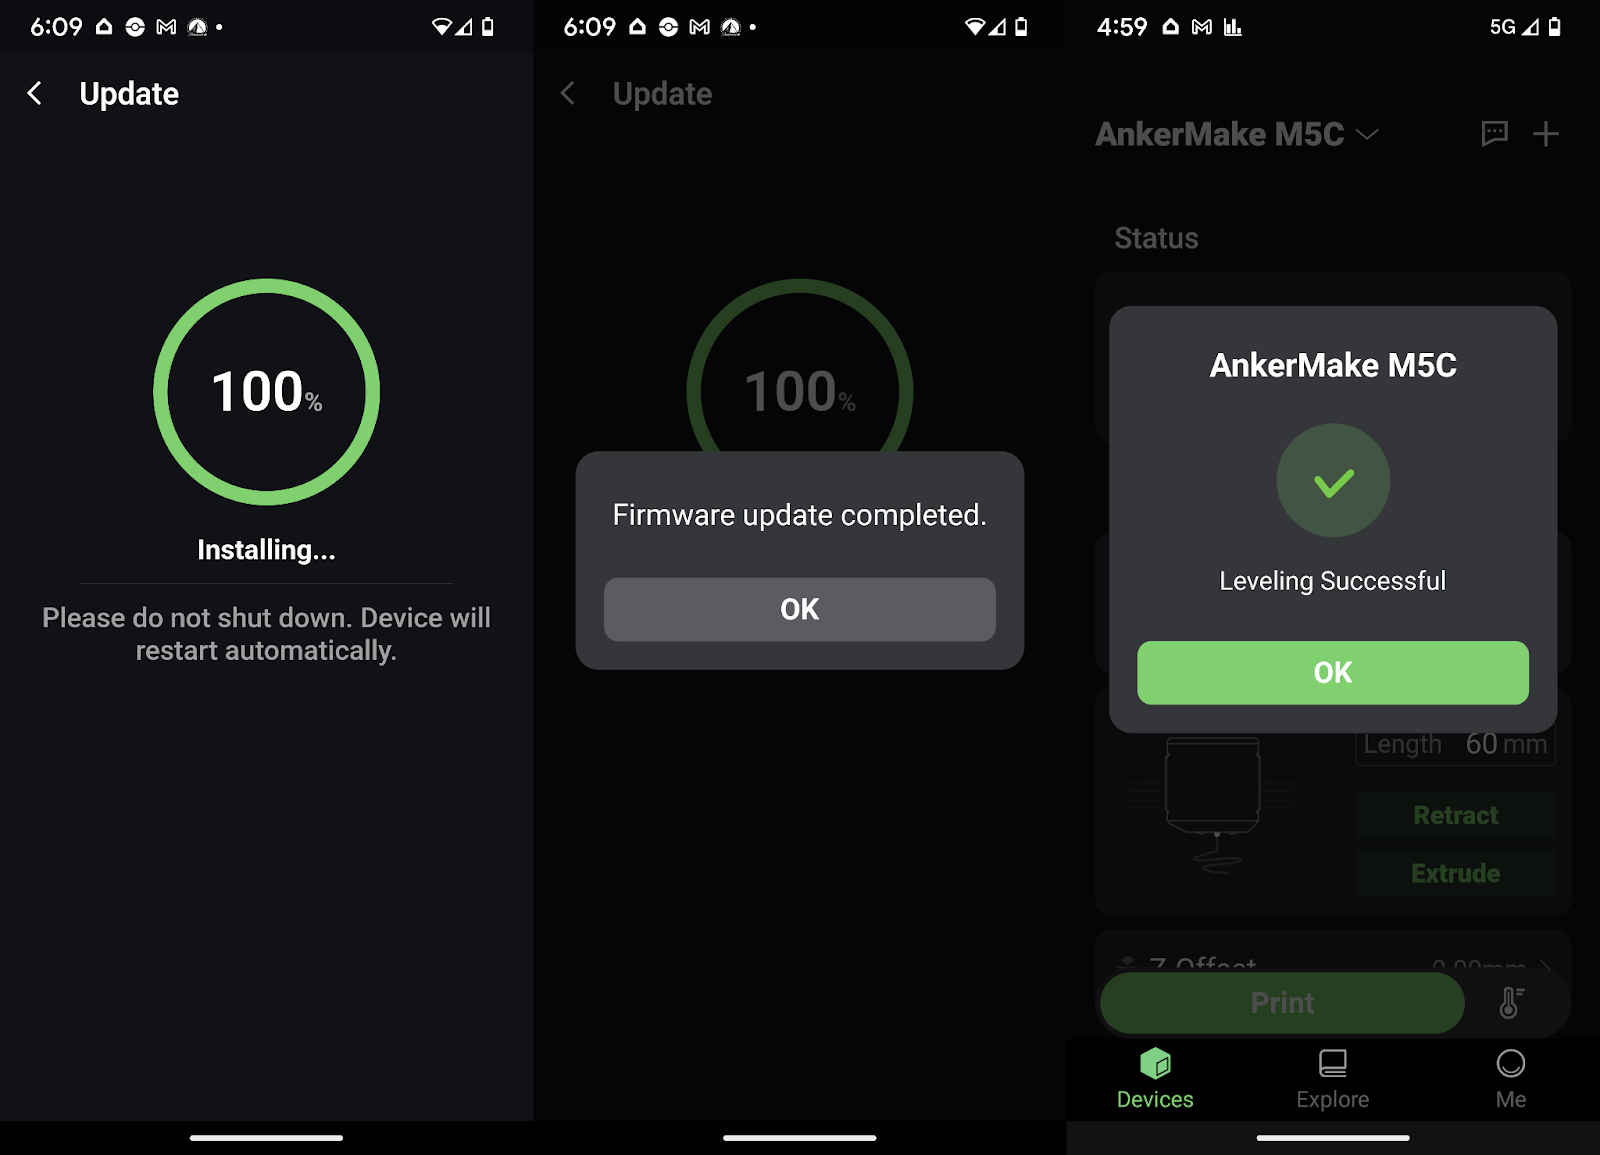
The Explore tab offers a more fun way to print, with pre-set models showing. From this tab you can peruse a list of models and start printing them directly from the app. The apps on display have been optimised for the AnkerMake 3D printer series, with 91 models available.
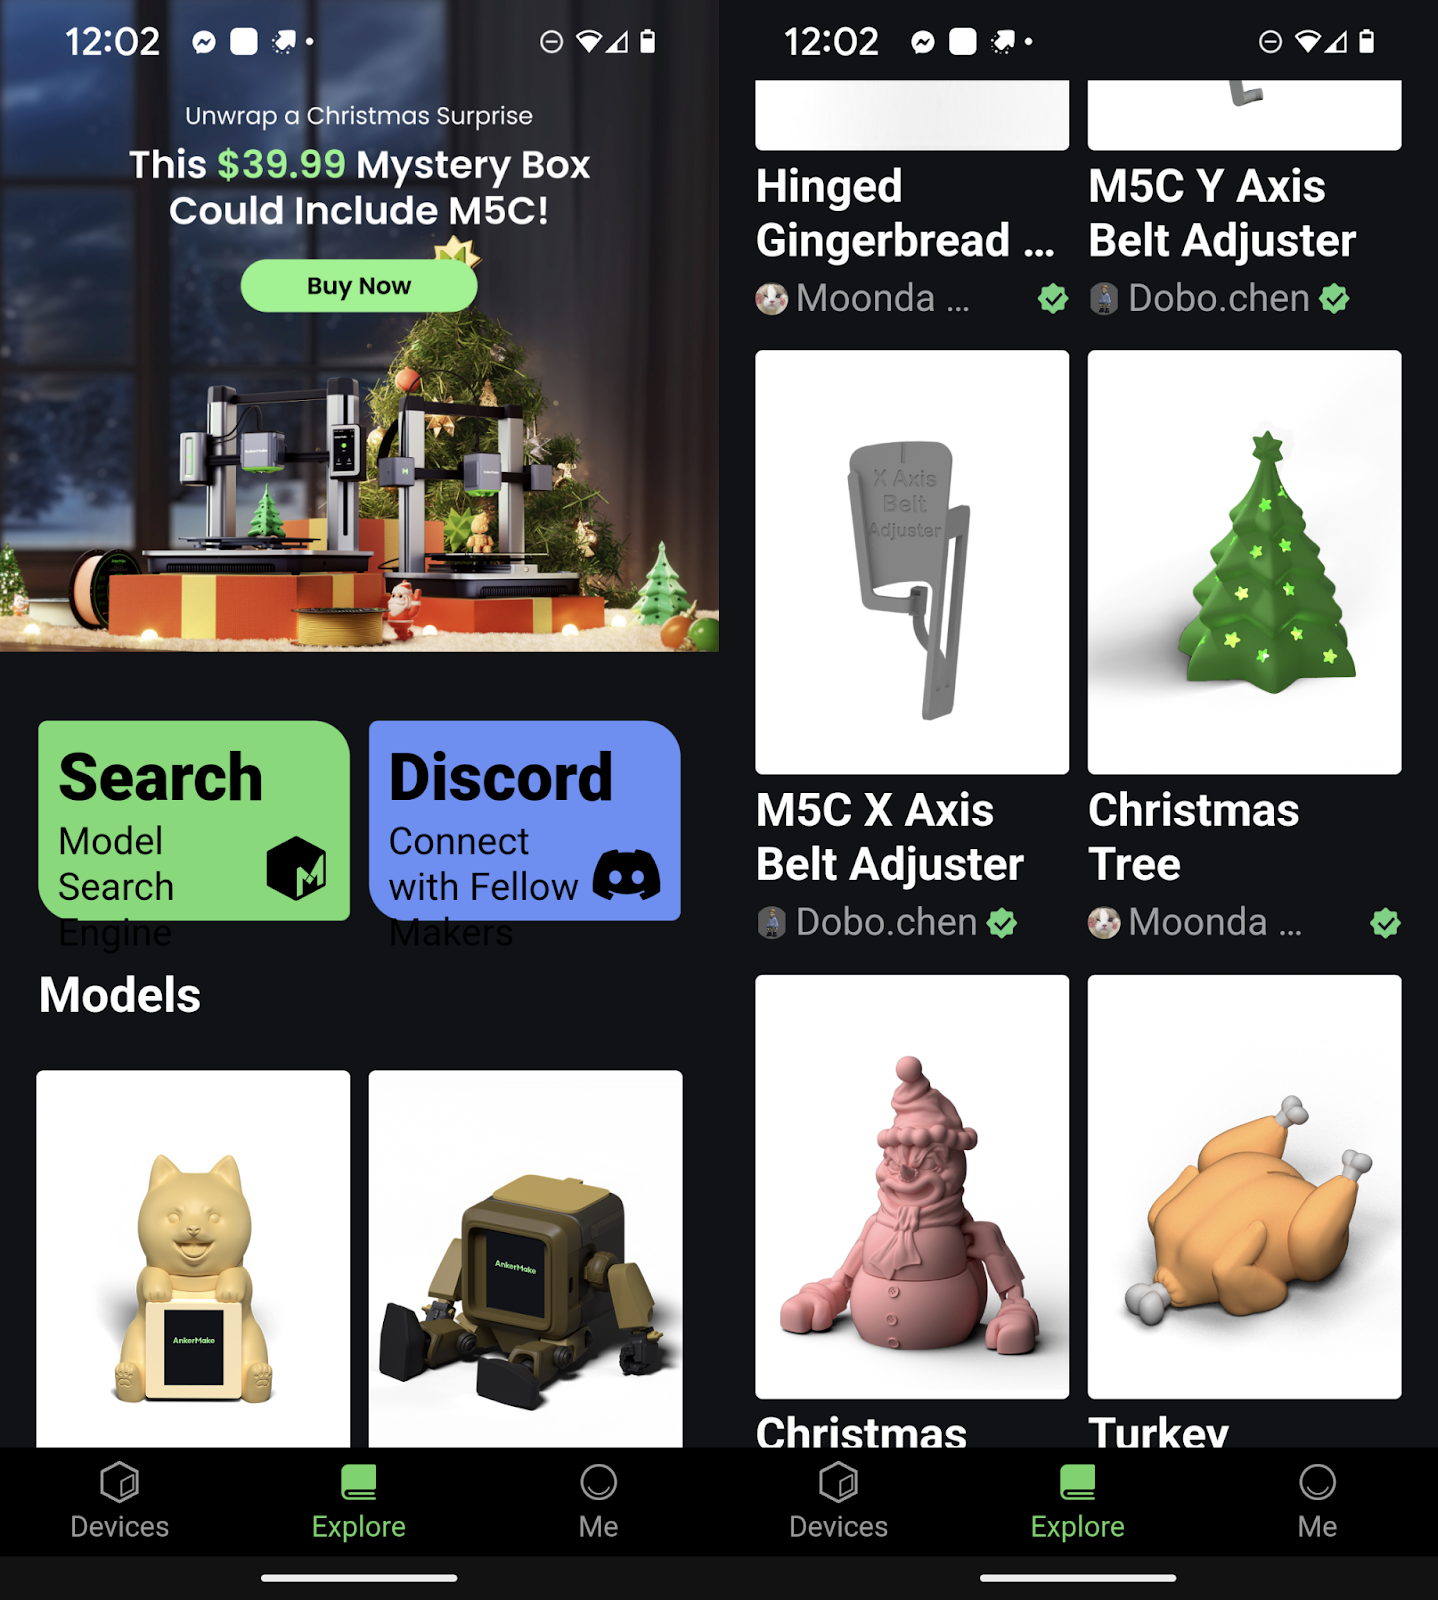
I printed the Benchy and Collapsible Katana from the app and both came out extremely well – and with an Anker logo on the pommel of the katana. There was also a recent refresh of the models on the page with Halloween themed models added and I printed a Skeleton from the Halloween update, and now there’s Christmas themed models available, as well as some parts you can print for your AnkerMake printer if you need them.
The models in the Explore tab appear to be pre-sliced, however while reviewing the Ankermake M5C, Anker updated the app with cloud slicing.
With the addition of cloud slicing, Anker added in Prusa’s Printables database to their search, though I had issues accessing the files. Once you find something you do want to print, simply hit the Download button and the online slicer does the rest.
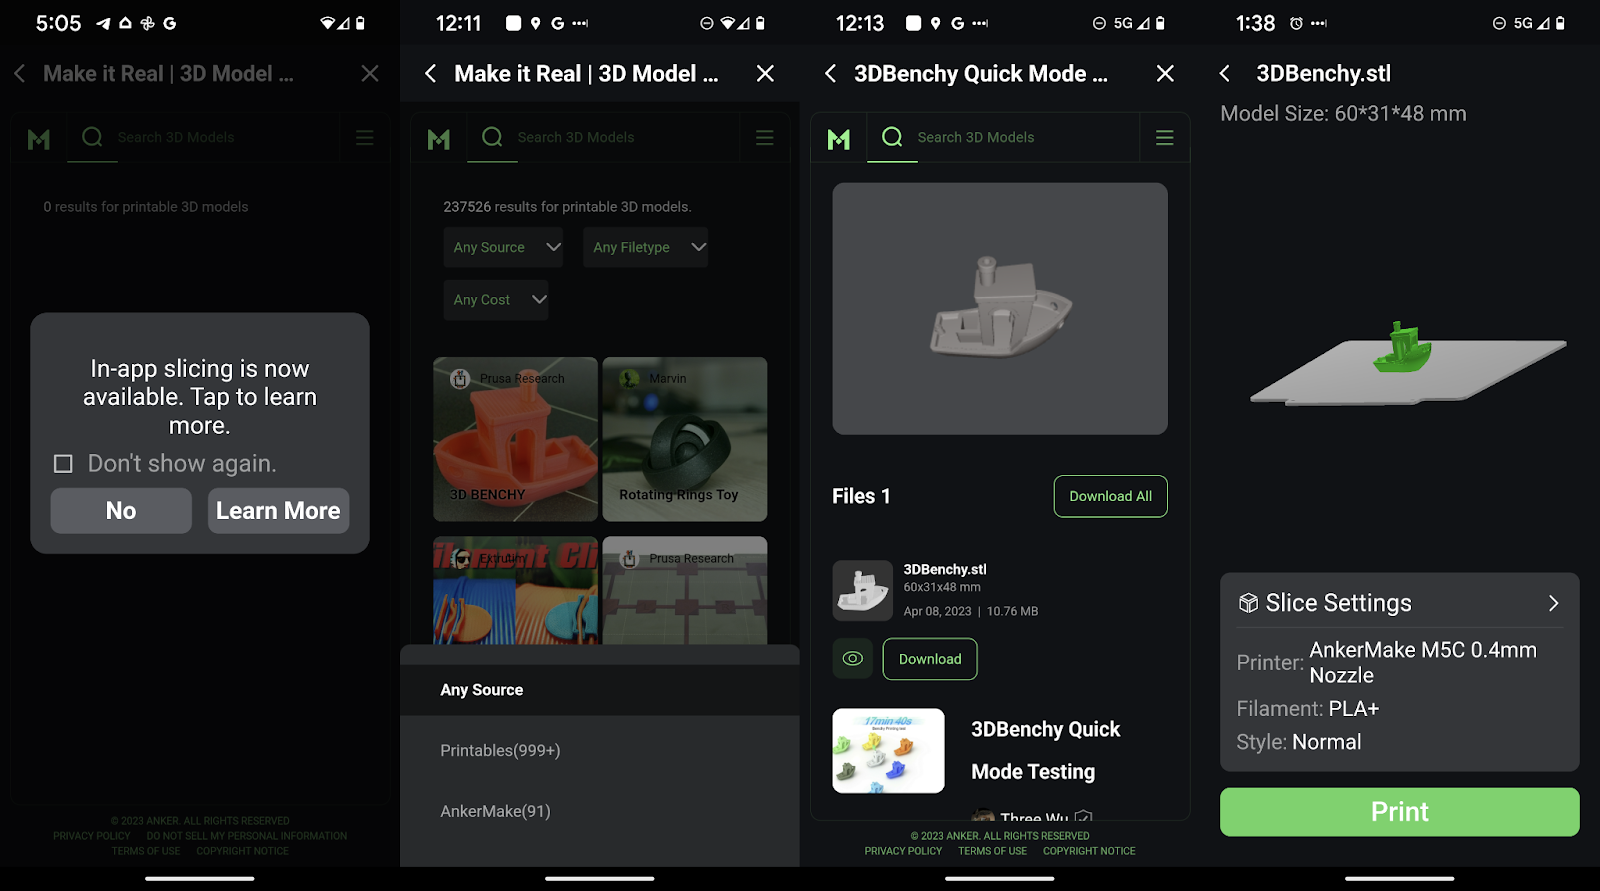
Once you find your model, the online slicer works and works well – though it is Beta, so I expect I’ll run into issues at some stage, but I haven’t as yet. Knowing I can search remotely and have something sliced online, start printing and ready to go when I get home is fantastic.
The Explore tab also has a link to the Discord channel, a place you can discuss the AnkerMake printers, get some unofficial help from the community or just talk about 3D printing in general. It helps if you’re familiar with Discord, but it’s a handy place to go when you need to.
I used the Discord channel for help and the response was great. You also the Support section of the official Ankermake website – which I also used and got great results, including having to email them.
Finally, the ‘Me’ tab lets you see account details including app permissions, Amazon Alexa integration and more.
The app has a monitor for when the printer is printing, offering you a summary on the settings, temperatures, how much filament has been used and the estimated time it will complete. Once finished you get a notification on your phone and then it’s simply removing the PEI plate to pop off your print.
You can choose to reprint the model from the app which makes it easy for bulk prints. Simply clear the bed, check your filament spool and hit reprint when you want to restart.
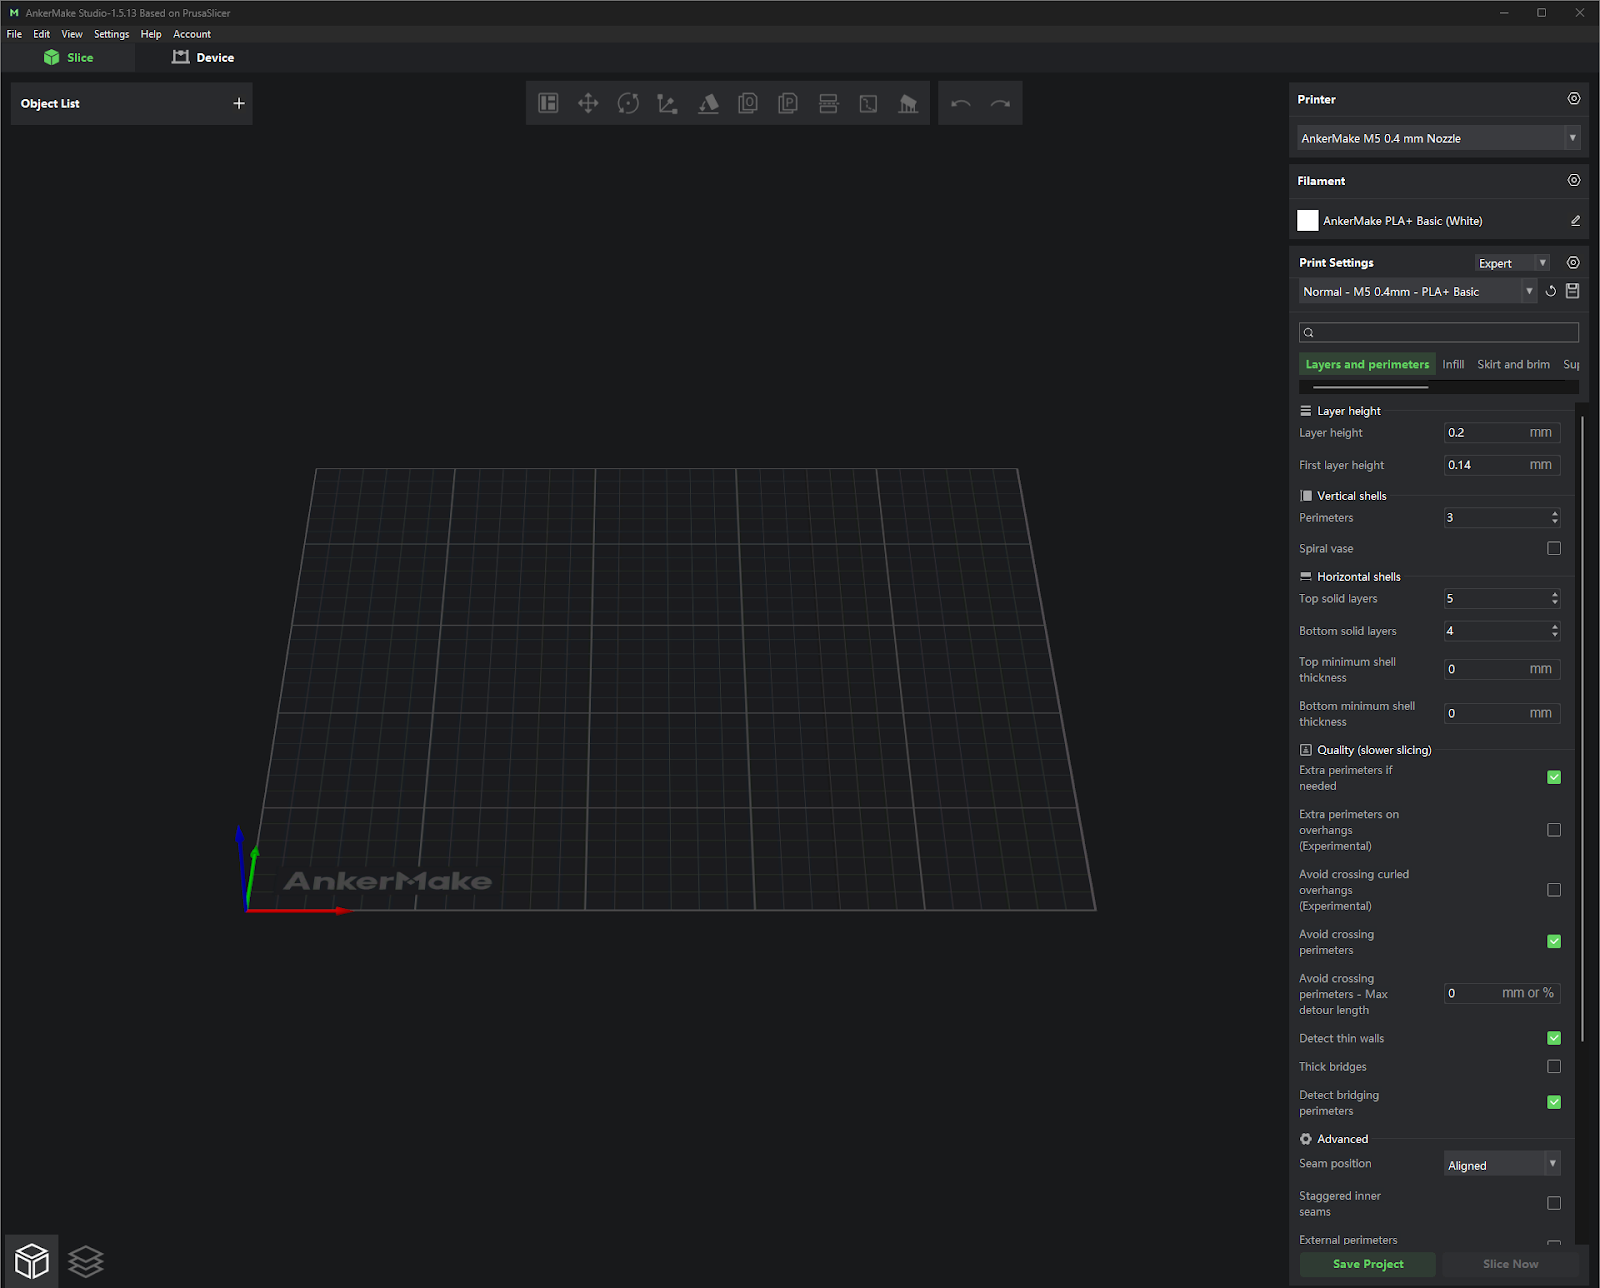
AnkerMake SlicerAnkerMake Studio
The AnkerMake Slicer software for PC and Mac, was updated during the review to AnkerMake Studio – though fundamentally there wasn’t a huge change.
The Ankermake software, be it Studio or Slicer, is receiving regular updates. It shows a commitment from the Anker support team, with tweaks to printers including improving retraction settings still coming, as well as adding features like Japanese support in their latest update.
For anyone who’s used the other slicing options you’ll find the initial screen quite simplified. While the simplified interface can be annoying for more advanced users, it’s these modes that Anker have used which help a lot.
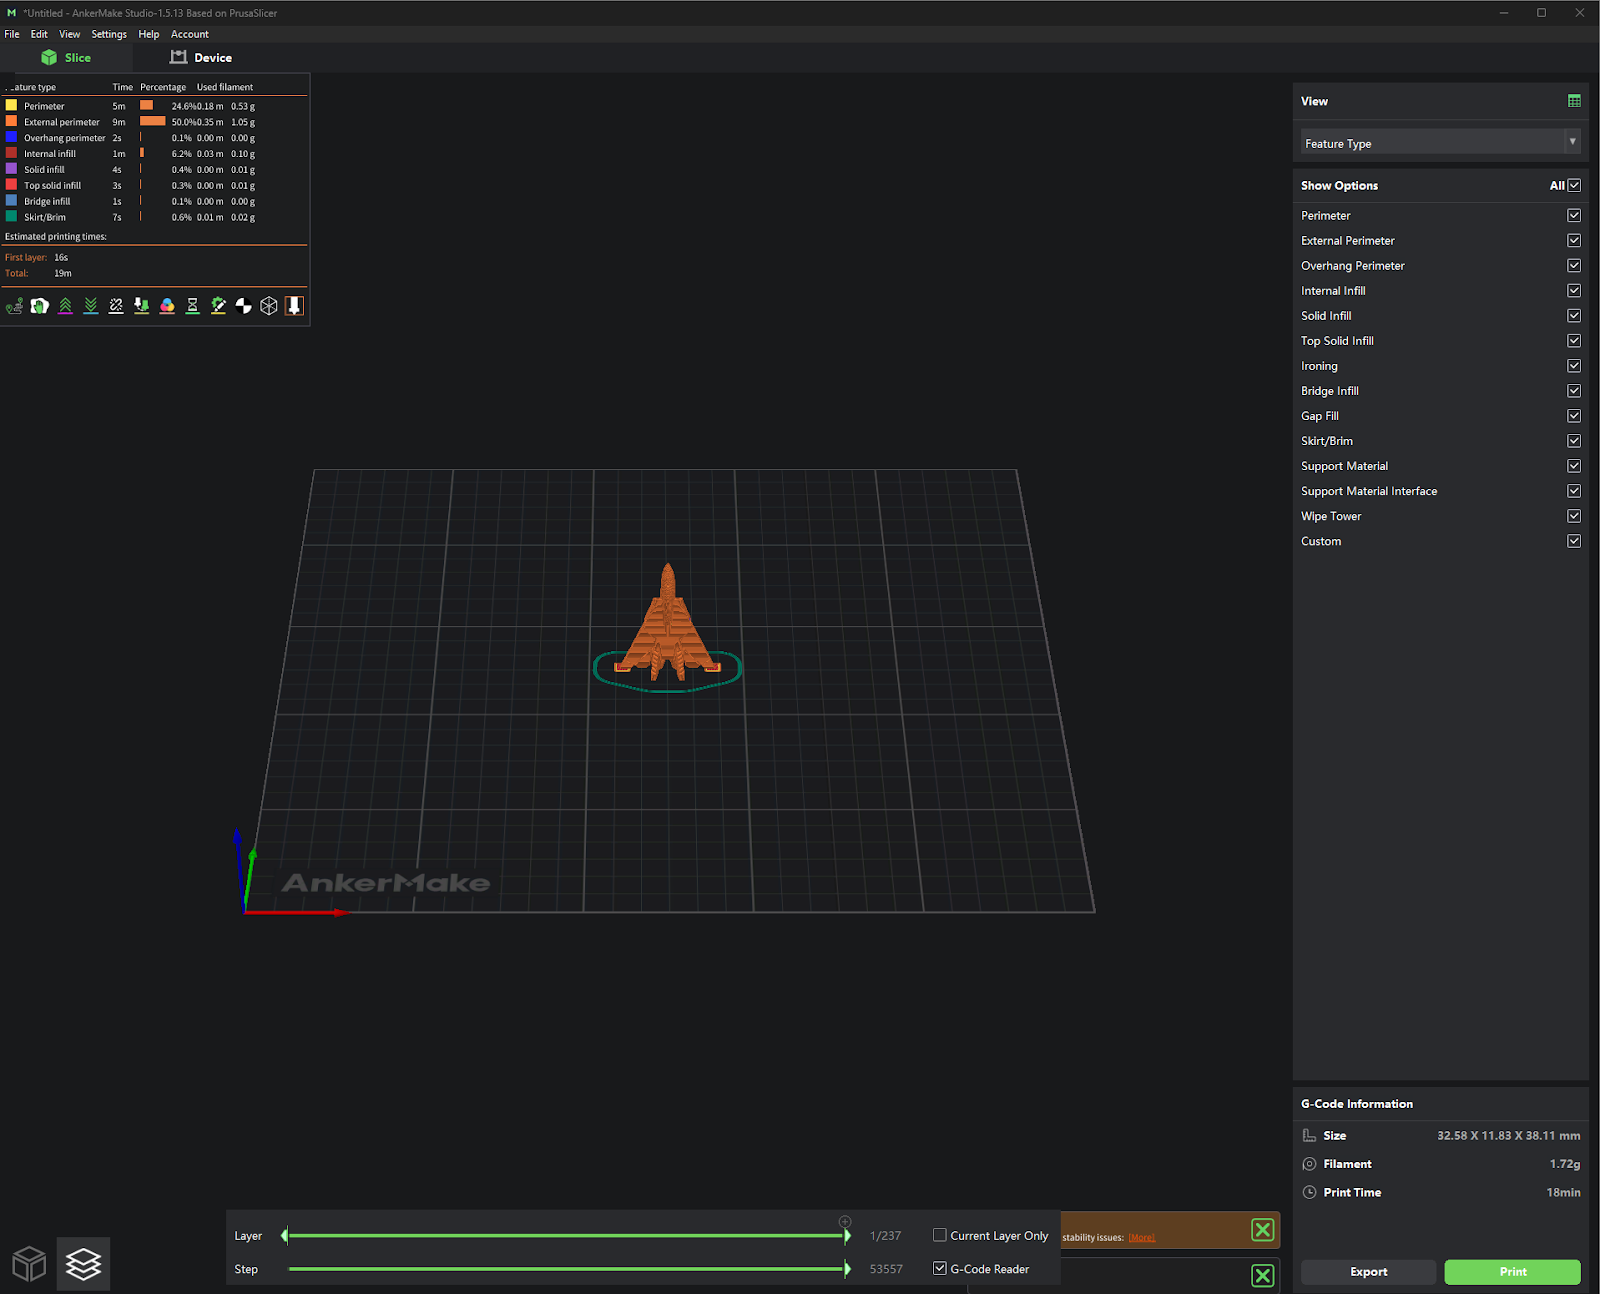
You can either use the File > Import, to load a file, or just drop any OBJ, 3MF, AMF, STEP or STL file onto the open slicer. The software renders it for you and you can then choose more about how it’s going to print.
It’s here the simplified interface can be a godsend to novice users. The Easy interface offers a friendly, and simple interface to just start printing, including an option to let you choose to print your model with a focus on ‘Fast’, ‘Normal’, or ‘Precision’ modes.
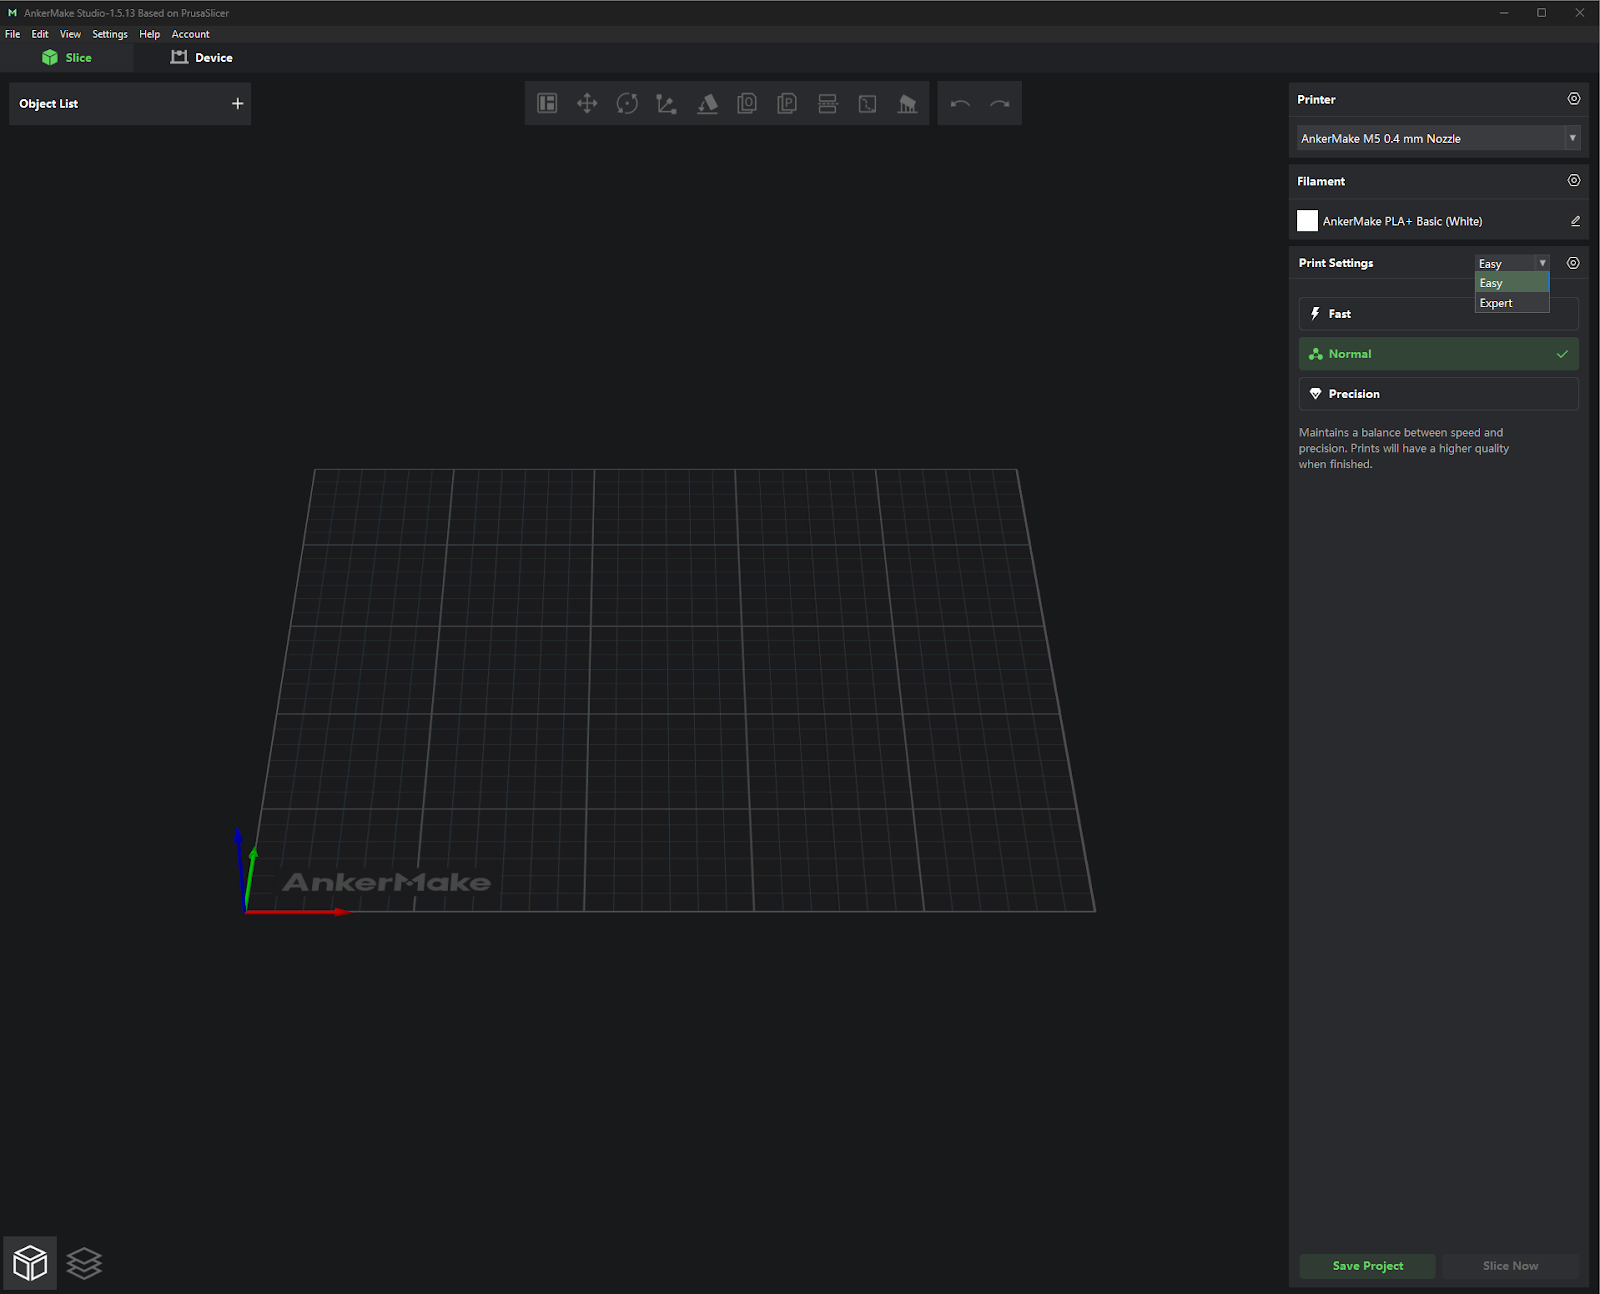
The Fast obviously prints with the fastest settings, while Precision is the slowest, but offers the best results. Normal finds a balance in between, and really is quite a good option for most.
For anyone who’s a 3D Printing veteran, the Expert mode offers essentially all the settings you would expect to see for infill, Supports, Walls, Speeds and more.
Once you’re finished slicing, you can then print. Select your printer and you’re off. The slicer wirelessly delivers the sliced file to your printer and you’re done.
Once you finish printing, just like the mobile app, you can select to either finish, or reprint your model once you’ve performed your checks.
Printing
Using the AnkerMake M5C, I’ve printed mostly in PLA+, but for the first time I ventured into more exotic materials. I nabbed some PETG, ABS and TPU from AnyCubic and without much effort started using printing with them.
The printer can handle PLA+ with ease, including resuming prints when it runs out of filament. I’ve run through so many easy prints with PLA+ that I’ve had to watch my spending on filament as it’s so easy to go through.


I’ve printed the Terminator bust project (a lot of finishing work is needed), as well as a bunch of functional prints such as solar mounts for Christmas lights, a dish cloth holder for the sink (some food-safe epoxy sprayed on this for ‘cleanliness’) and of course, a bunch of ‘useless’ trinkets like Shopping trolley tokens, toys and more.
As above, I’ve been experimenting with PETG, ABS and TPU and had mixed results. The printer has an all-metal hotend and has the ability – it’s now up to me. My PETG and ABS prints have come out, though with some layer adhesion issues – however, after research this is a material problem, with the printer really needing an enclosure to print these materials. I usually have my printer in a closet, however after discussing with other owners, it’s not quite the right environment to get the even temperature that PETG and ABS need and I am confident I can get better results once I get that enclosure.

As with ABS and PETG, TPU has been a difficult monster to slay, but I will get there and again, the enclosure is likely to help. I am continuing to speak with the other 3D printing enthusiasts on the Ankermake sub-reddit, as well as the Discord channel for tips. I will print my own phone case soon.
Overall, the Ankermake M5C out of the box will print just about anything you want in PLA/PLA+, but you will likely need to get an enclosure to get the best results for other materials. That said, the majority of things I want to print only require PLA and for that, it’s absolutely perfect.
Should you buy it?
It’s not often that I’m simply this enthused by a product, but the AnkerMake M5C is fantastic. If you’re looking for an easy to use 3D printer without the fuss, the AnkerMake M5C is the best option to look at. However it does come with a premium price.
There’s going to be a lot of people reading this review with opinions on 3D printers you can get a hold of for a lot less. I’ve printed with these printers, learned a lot and value the experience, but I’ve often spent what felt like more time troubleshooting those printers than actually printing. The AnkerMake M5C simply offers a super easy way to get printing for almost anyone, with good results almost guaranteed.
The combination of premium hardware and an excellent, user-friendly software system makes for a very attractive offer for anyone wanting to start printing without a lot of the frustrations often associated with 3D printing. A remote monitoring option like a camera would be an excellent option but even without an official option, you can set a camera up nearby.
At $799 if you do have the budget for it, this is one of the best 3D printers I’ve used. You can check out the AnkerMake M5C over on the AnkerMake website.
Daniel has been talking about, learning about and using tech since he was able to toggle switches and push buttons. If it flashes, turns on or off or connects he wants to use it, talk about it and learn more about it. Like this article? Buy me a coffee!


